
Transforming a suburban residence into a fossil-fuel-free sanctuary requires more than just swapping out a few appliances; it necessitates a comprehensive structural and logistical overhaul of the entire energy profile of the property. While the motivation often stems from a desire to reduce carbon footprints or lower monthly utility bills, the actual execution involves navigating complex electrical codes, structural limitations, and the bureaucracy of utility companies. In the current landscape of 2026, many homeowners are discovering that the transition from a gas-dependent infrastructure to a fully electrified system is a journey of precision and persistence. This process often begins with a fundamental shift in mindset, moving away from the familiar blue flame of a gas stove and the roaring burner of a traditional water heater toward the silent, efficient precision of modern induction and heat pump technologies. By systematically addressing each gas-burning component, a household can successfully disconnect from the volatile pricing of natural gas and tap into the cleaner, more resilient power of a modernized electrical grid.
The decision to eliminate gas entirely is rarely an overnight event but rather a calculated series of upgrades that prioritize high-impact appliances. The financial commitment involved in retrofitting an existing home is significant, yet the long-term benefits of improved indoor air quality and reduced maintenance costs often outweigh the initial expenditure. For a typical family, the journey involves auditing every gas-fed device, from the central furnace to the small pilot light in a decorative fireplace. This audit serves as the roadmap for the entire project, ensuring that electrical capacity is upgraded before new loads are added and that no stray gas lines remain active after the meter is removed. Modern electrification is not just about replacing one fuel source with another; it is about optimizing the home as a holistic energy system that can interact intelligently with local renewable resources and storage solutions.
1. Establishing Priorities: Initial Planning and Strategic Goals
The first phase of a successful home electrification project involves identifying which fossil-fuel appliances are the most critical to replace and in what order. This hierarchy is usually determined by the age and efficiency of current equipment, as well as the immediate impact on the household’s gas consumption. Cooking surfaces and water heaters typically top the list because they are the most frequent points of interaction for the residents and represent a significant portion of daily energy use. By focusing on these primary gas users first, the household can achieve an immediate reduction in fossil fuel reliance while setting the stage for the removal of secondary items like outdoor grills, pool heaters, or gas-fed fireplaces later in the process. This phased approach allows for better budget management and gives the family time to adjust to the nuances of electric living before the final severance of the utility line.
A comprehensive plan must also account for the interdependencies between different household systems. For instance, upgrading to an all-electric kitchen might require a larger electrical panel or a service upgrade from the utility provider, especially if a high-capacity heat pump for space heating is also in the works. Planning must be holistic, considering not just the appliances themselves but the infrastructure that supports them. This includes checking the capacity of the existing distribution board and ensuring that the home’s thermal envelope is efficient enough to maximize the benefits of new, high-efficiency electric systems. Without a clear strategy, homeowners risk the frustration of purchasing expensive equipment only to find that their current electrical service cannot safely handle the increased load. Therefore, the initial planning phase is as much about engineering and load calculation as it is about selecting the sleekest new induction range or the quietest heat pump on the market.
2. Evaluating Requirements: Induction Cooktop Installation
Before purchasing a new induction cooktop, a thorough assessment of the kitchen’s physical and technical constraints is essential. Induction technology relies on electromagnetic fields to heat cookware directly, which requires specific physical clearances and a robust electrical supply that differs significantly from standard gas or radiant electric setups. The first step in this evaluation is measuring the existing countertop cutout. Most modern induction units have precise dimensions that may not perfectly align with the hole left by an older gas cooktop. If the new unit is larger, the stone or laminate surface will need to be professionally modified, a process that requires specialized tools and careful dust management to prevent damage to the surrounding cabinetry and finishes. Conversely, if the new unit is smaller, a custom trim kit or a partial countertop replacement may be necessary to ensure a seamless and aesthetically pleasing fit.
Beyond the physical dimensions, the internal environment of the kitchen cabinets must be evaluated for airflow and heat dissipation. Although induction cooktops do not produce open flames, the electronic components and powerful magnets inside generate internal heat that must be vented away to prevent the unit from throttling its power or suffering premature failure. Many high-performance models require a specific amount of clearance below the unit, often necessitating the removal of a top drawer or the installation of a ventilation baffle. Simultaneously, the electrical requirements are paramount. Unlike gas units that might only need a standard 110-volt outlet for an igniter, a high-performing induction cooktop typically requires a dedicated 240-volt circuit with a 30-amp to 50-amp capacity. This usually involves running a new, heavy-gauge wire from the main electrical panel to the kitchen, a task that must be performed by a licensed electrician to comply with local safety codes and ensure the long-term reliability of the appliance.
3. Assessing Needs: Heat Pump Hot Water Systems
Transitioning from an instantaneous gas water heater or a traditional gas tank to a heat pump system requires a different set of logistical considerations. Heat pump water heaters are essentially air-conditioners running in reverse; they pull heat from the surrounding air and transfer it to the water in the tank. Because of this mechanism, the location of the unit is critical. It must be placed in a space with sufficient ambient air volume to function efficiently, typically at least 1,000 cubic feet, or be ducted to the outdoors. Homeowners must also account for the footprint of the storage tank itself. Unlike compact, wall-mounted gas heaters, heat pump systems involve a large, insulated tank that can take up significant floor space. Identifying a spot that accommodates this tank without obstructing walkways or detracting from the home’s exterior aesthetic is a key part of the pre-installation phase.
The structural and environmental impact of the new system also demands careful thought during the planning stages. A large storage tank can weigh over 880 pounds when full of water, requiring a level, structurally sound foundation or a reinforced floor to prevent settling or structural damage over time. If the condenser is a separate external unit, similar to a central air conditioner, it must be positioned to meet local noise ordinances and manufacturer-specified clearance regulations for airflow. Furthermore, proximity to the points of use, such as showers and faucets, is a major factor in system efficiency. Placing the tank as close as possible to these fixtures reduces the “wait time” for hot water and minimizes heat loss through the pipes. Finally, because many modern heat pump systems utilize smart apps for monitoring and scheduling, verifying that the chosen location has a strong and reliable Wi-Fi signal is necessary for taking full advantage of the unit’s energy-saving features.
4. Executing the Retrofit: Physical Cooktop Installation
With the planning and assessment complete, the physical installation of the induction cooktop begins with the modification of the kitchen environment. If the assessment revealed that the existing countertop opening is too small for the new appliance, a professional fabricator typically uses a wet saw or a specialized grinder to enlarge the cutout. During this process, extreme care is taken to mask off the rest of the kitchen, as cutting stone or composite materials creates significant amounts of fine dust. Proper safety gear, including respirators and eye protection, is mandatory during this stage. Once the opening is precisely sized and the edges are smoothed, the cabinetry beneath is prepared by ensuring there is adequate space for the unit’s cooling fans to operate. This might involve trimming the back of a cabinet or adjusting the height of a shelf to meet the manufacturer’s rigorous ventilation specifications.
The electrical integration follows the physical preparation, involving the routing of high-voltage wiring through the home’s structure. An electrician typically pulls the necessary 240-volt cable through wall or ceiling cavities to reach the kitchen, often using “fishing” techniques to avoid opening up large sections of drywall. A dedicated safety disconnect or an isolation switch is installed in a visible and reachable location near the cooktop, providing a quick way to cut power in the event of a malfunction or for future maintenance. Once the wiring is in place and the junction box is secured, the induction unit is lowered into the countertop opening. It is then wired directly into the new circuit, and the edges are often sealed with a heat-resistant silicone or a specialized gasket provided by the manufacturer. The final step of the retrofit involves a series of tests to verify that every cooking zone functions correctly and that the safety sensors, such as pan detection and auto-shutoff, are fully operational.
5. Completing Integration: Hot Water System Setup
Finalizing the hot water system involves a precise synchronization of plumbing and electrical work. Once the foundation is ready and the tank is positioned, the plumber connects the home’s cold water inlet and the hot water outlet to the unit. High-quality thermal insulation is applied to the first several feet of piping to prevent heat loss, a crucial step in maintaining the high efficiency of a heat pump system. Because these units extract moisture from the air as they cool it, a condensate drain line must also be installed to safely route water away from the unit and the home’s foundation. This plumbing work is done in tandem with the electrical connection, where a dedicated circuit is wired to the unit’s control board and heating elements. This ensures that the system has enough power to run the compressor and, if necessary, the backup resistive heating elements during periods of extreme demand.
After the physical connections are secured, the focus shifts to optimizing the performance of the system to match the household’s energy profile. Modern heat pump water heaters are equipped with sophisticated controllers that allow users to set heating schedules. To maximize savings, the system can be programmed to perform its primary heating cycles during the day when solar production is at its peak or at night when electricity rates are at their lowest. This “load shifting” capability is one of the primary advantages of an electric home, as it allows the family to use the water heater as a thermal battery, storing energy in the form of hot water when power is cheapest or cleanest. Once the system is pressurized and the air is bled from the lines, a final check of the Wi-Fi connectivity and the smart app interface ensures that the homeowners can monitor their energy usage and water temperatures in real-time, providing both peace of mind and actionable data.
6. Permanent Termination: The Gas Abolishment Process
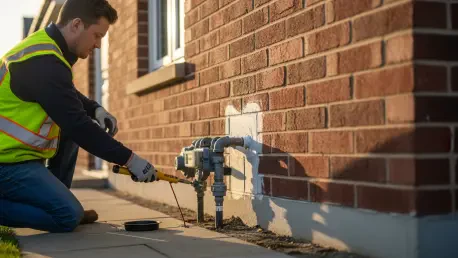
Achieving a truly fossil-fuel-free home requires more than just turning off the gas at the meter; it necessitates a process known as abolishment. Unlike a simple disconnection, where the account is closed but the physical infrastructure remains, abolishment involves the permanent removal of the gas meter and the capping of the service line at the main. This is a critical distinction for homeowners who want to eliminate the recurring “service availability” fees that utility companies often charge as long as a meter is present on the property. The process begins with a formal request to the gas distributor, which usually involves submitting documentation that all gas-burning appliances have been removed or replaced. This starts a bureaucratic and technical chain of events where the utility provider schedules a team to come to the property, dig up the service line near the street, and permanently crimp or seal the pipe to prevent any future gas flow.
Monitoring the abolishment process is vital to ensure that the utility company completes all the necessary steps and that the property is correctly updated in their database. Technicians will physically remove the meter and the regulator, often leaving a hole in the exterior wall that the homeowner must subsequently patch and seal. Once the distributor has finished their work, it is common for residual hardware, such as mounting brackets or old copper piping, to be left behind on the home’s exterior. The final stage of gas removal involves the homeowner or a contractor taking down these eyesores and ensuring the gas lines inside the house are either removed or safely capped and labeled as decommissioned. By seeing this process through to completion, the family ensures that the home is legally and physically recognized as an all-electric residence, which can simplify future renovations and potentially increase the property’s market value in an energy-conscious real estate market.
7. Finalizing Transition: Secondary Equipment and Fireplaces
The final phase of the electrification journey involves addressing the smaller, often overlooked gas-fed devices that might still be lingering in the home. Secondary gas equipment, such as decorative fireplaces and outdoor grills, can be easily forgotten once the major appliances are switched over, but they must be handled to achieve total gas independence. Decommissioning a gas fireplace often involves removing the old ceramic log sets and burners, followed by a thorough cleaning of the firebox. Homeowners then face a choice: they can leave the fireplace as a purely decorative feature, seal it off to improve the home’s airtightness, or install a modern electric fireplace insert. These electric alternatives have advanced significantly, offering realistic flame effects and supplemental zone heating without the indoor air pollutants or heat loss associated with traditional gas-vented systems.
Outdoor living spaces also require attention to detail to ensure the gas line can be fully retracted from the yard. For families who enjoy outdoor cooking, replacing a gas-fired grill with a high-quality electric smoker or an induction-compatible outdoor kitchen setup is the preferred route. Some high-end gas grills can be converted to electric power using specialized kits, though most homeowners find that purchasing a dedicated electric unit provides better performance and weather resistance. Once these secondary units are removed or converted, any remaining gas pipes running through crawlspaces or under decks are disconnected and removed. This final sweep not only ensures safety but also provides a sense of closure to the project. The result is a home where every function—from heating and cooking to ambiance and entertainment—is powered by a single, clean energy source, marking the successful completion of a complex but rewarding transition.
Strategic Pathways: Future Resilience and Long-Term Outcomes
The successful electrification of the residence eventually led to a measurable improvement in both the operational efficiency of the home and the overall comfort of the occupants. Looking back on the process, the transition proved that a methodical approach to infrastructure permitted a seamless shift away from fossil fuels without sacrificing the quality of daily life. The household noticed an immediate change in the indoor environment; the absence of combustion byproducts from the stove and the water heater resulted in fresher air and less reliance on heavy ventilation. Furthermore, the integration of smart scheduling for the heat pump systems allowed the family to take advantage of fluctuating energy prices, effectively insulating them from the volatility of the broader energy market. The project demonstrated that while the initial hurdles were technical and bureaucratic, the long-term stability of an all-electric home provided a level of predictability that gas-dependent systems could never match.
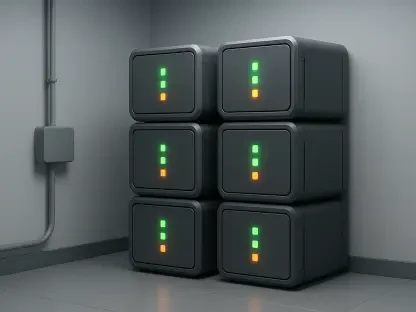
For those considering a similar path, the next steps involve a focus on data and continued optimization of the home’s energy profile. It is recommended that homeowners install a whole-home energy monitor to track the performance of their new electric appliances in real-time, allowing for further refinements in usage patterns. As the local electrical grid continues to evolve, these electrified homes are perfectly positioned to participate in demand-response programs, where the utility company may offer incentives for reducing power usage during peak times. Additionally, the groundwork laid during the electrification process makes the future addition of battery storage or an electric vehicle charging station much simpler and more cost-effective. By viewing the home as a dynamic part of the energy transition rather than just a passive consumer, the family secured their place in a more resilient and sustainable housing market, providing a clear template for others to follow.